In Part 1 of my Countertops blog, I walked through the process I went through to get new countertops installed. Some might say, “Joe! you’re supposed to be a DIY guru and do everything without the help of professionals.” I say, “That’s baloney!” An important understanding that every person should come to know is when to call for help. In my case, it was the knowledge that there are a series of specialized tools and skills to install countertops safely and with high quality. In the category of skills, how does one even go about measuring and cutting quartz countertops to fit? The answer is Templating! The foreman came a couple days before the install day and cut semi-rigid strips to match the perimeter of the countertops, then used acetone to chemically weld the strips together…Genious!
Then there are specialized tools to achieve a high quality install. The crew had a really nifty vacuum pump countertop seamer and fancy drill bit that melted through quartz countertops like it was putty. Watching the crew work, I kept commenting how cool their tools were, and they definitely knew how to use them. Which brings me to a point about leadership, engage with the crew and show an interest in the skillsets they bring to the table. By engaging with the crew, it shows an appreciation for what they can do and allows them to showcase those skills. By the end of the job, we were joking about who had the smallest hands in the room and who should be the one to crawl under the sink and tighten the sink support bracket bolts, it was me by the way, but they didn’t make make me do it. Building the relationship made the job enjoyable for all parties and at the end of the job when I pointed out a few blemishes they efficiently touched them up before leaving.
So to summarize my points
Know when to call in the professionals, by better understanding your limits.
Engage and admire a crew that knows what they are doing.
Can you share a time your brought in some help to take on a job? What about crew engagement? If you have any thoughts you’d like to share, leave a comment below!
In this week’s blog, I tackle the job of replacing my kitchen countertops. Countertops are probably the fastest way to completely change the look and feel of your kitchen. In my case, I had ceramic tile countertops that were terrible to clean, and the uneven surfaces made wiping up messes a pain. When we purchased the home, we always knew we would one day replace the countertops with a solid surface, but we didn’t know exactly what type of solid surface. there are four categories of solid surface countertops: laminate, stone, manufactured stone, and other. I know “other” is not a very helpful category but it captures the more exotic areas of concrete, wood, and metal tops, which we won’t go into much detail about here. The most common ones are laminate (value), stone (classic), and manufactured stone (durability).
When homeowners are considering new countertops, most immediately think of stone tops also referred to as granite. Granite looks great and is the trending preferred top for new home construction, but it does have some downsides. It does require maintenance for it to keep its pristine glossy look over the years. A great alternative to granite is manufactured stone, also commonly called quartz. Price point between granite and quartz are often fairly similar, but depending on patterns and marketing can be quite different. Attractive points for quartz include low to zero maintenance, no resealing required, and more heat and impact resistant than granite. For me, low maintenance and higher durability are fast lanes to my heart. So without further adeu, let’s replace some countertops!
Material Selection
As I mentioned above quartz checked the low maintenance and high durability boxes for me, but what I quickly found was there is a myriad of quartz manufacturers advertising higher quality, more exotic patterns, extended warranty periods, etc. After conducting my research, I came to the conclusion that for me, the added cost for going with a big box store brand with their marketing and extended warranty claims was not worth it. Why you might ask? Well, let’s think about the product with an applied warranty. In this case, it’s quartz, it’s about as close to an artificial “Rock” as we can get. So does it really make sense to pay extra money for a warranty on a rock…Not to me. What did matter to me was who I was going to purchase this material from and did they have a good reputation. After a little bit of googling and calling around and I found a fantastic local shop that specialized in granite and quartz countertops. A quick visit to their shop and I got a good comfort level they knew what they were doing and selected our new countertops.
Take pictures with and without flash to get a sense of color in different lighting
I personally like veining in my countertops
Demo
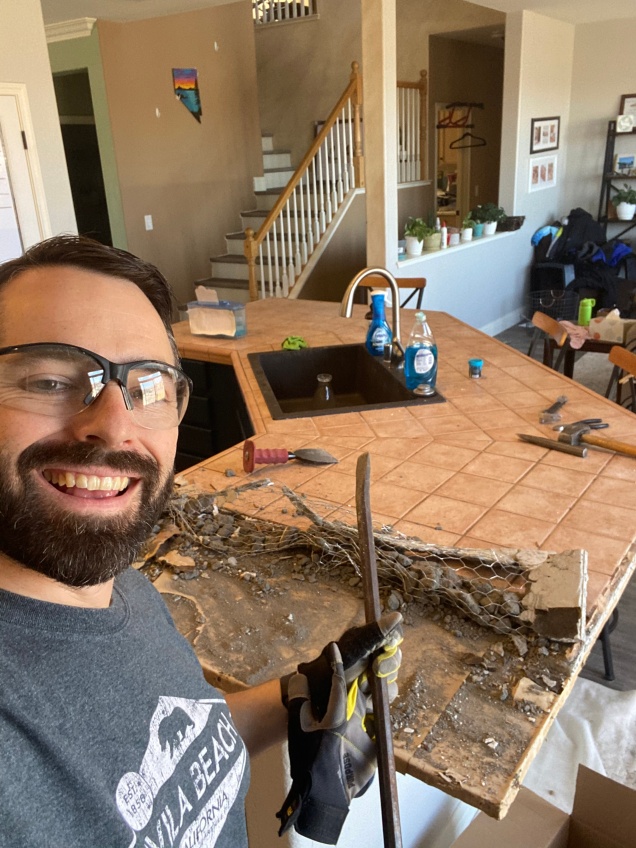
When working on the quote, I asked if it would be okay if I performed my own demo and substrate (the layer below the countertops) preparation? The installer was happy to deduct it from the proposal and it saved me thousands of dollars by doing so. For me this is a win-win, I get to swing a hammer in the house and save money while doing it, Score! Probably the biggest learning from the demo of the countertops was the amount of wasted time trying to save the drywall behind the tile backsplash. After spending a lot of time and still causing extensive damage to the drywall, we ended up using an oscillating saw to cut out the drywall and remaining backsplash. The other time consumer was removing all the staples from the wire mesh below the old tile countertops. I’m not entirely sure it was a necessary step, but it was a good distraction for the kiddos to work on.
crow bars and hammers, yahoo!
Lesson learned, don’t try to save the drywall behind a tile backsplash.
Don’t mind the missing drywall behind the stove honey…
It fits!
Gotta pull all those staples…oof.
Pro Tip: demo the tile up to the sink and leave it in service until install day.
Install
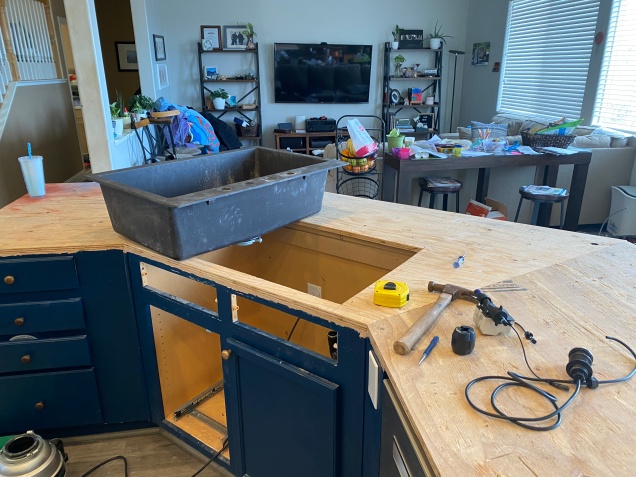
Alrighty, the big day, INSTALL DAY! With all the demo and preparations done, we were ready for the installers. We held out taking the kitchen sink and stove out as long as possible, but finally had to take them out the night before. Living without a sink and stove is doable for a day or two, but try to avoid going any longer than that. SCOPE CREEP – While the installer was drilling the holes for the faucet, I asked if he could drill an extra hole for an Insta-hot, and no problem, just point and he drilled. Whelp, now I’m pretty committed to getting an insta-hot. What’s an insta-hot you may ask? Well, it’s a special water faucet the dispenses near-boiling water on command, they’re great for tea, ramen, or honestly cleaning stuck on dishes where you need just a bit of really hot water.
We reused the old sink but installed it as an undermount for a new look.
Ready for a face lift.
Really heavy giant puzzle pieces
better move those fingers, otherwise they’re staying with the hosue.
specialized tools to join the slabs
Making the holes for the sink accesories
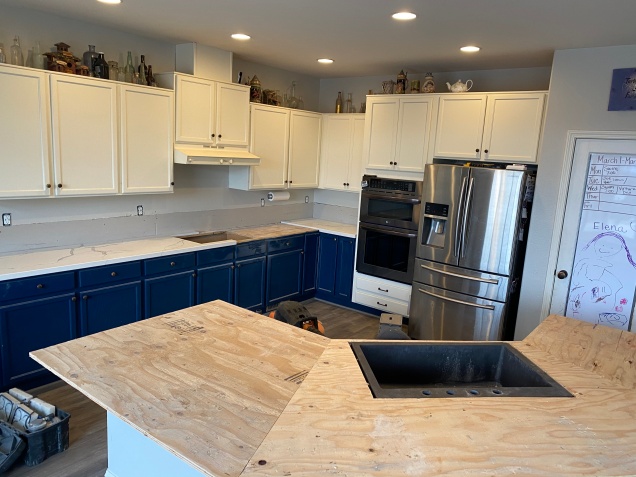
I couldn’t be happier with how the finished product turned out. The crew was in and out in a matter of hours and they stayed late to get the jobsite cleaned up better than they found it. The transformation from the old tile surface to the quartz surface brightens up the kitchen and adjacent living space.
Old and drab
New and shiny!
Let me know if you have questions about installing countertops or what more specifics on anything I glossed over…maybe that insta-hot, and if you like this content please subscribe to the right.
In Part 1 of my floors project, I shared the removal and installation of floors in my personal residence. The project was extensive and posed many challenges that in reflection made me appreciate the power of teamwork and networking. First, on the topic of teamwork, my Uncle used to always say “Many hands make light the work”. Did a little digging and the earliest references to the quote date back to ancient Roman times, and first appear in English in Proverbs by John Heywood in 1546 according to the website Idioms. History lesson aside the statement holds true, early on in the project I enlisted the aid of my family and friends and you can see many of them in many if not most of the pictures I posted in Part 1.
Having helping hands available can make jobs go so much quicker and become a social event that builds relationships, but I will caution that if you are organizing the workday, be prepared to have jobs outlined for the folks coming over. In the case of the pics below, I had the biggest workforce come on demo day which was not by accident. The obvious reason is demo just takes a lot of work and the more help the better, but there is a more subtle reason for targeting demo day, the work is easily described and can be done by just about anyone. When bringing in help for technical work, such as the install of the floors in this project, I needed to put some forethought into who can work where?, do I have enough tools and materials? and who should work in what area? which brings me to my second point networking.
Networking and expert resources are key to successful projects, and I would not have finished this project in the time that I wanted had I not had a little help from my network of friends. It so happens, that one of my friends used to be a professional flooring installer, I know pretty cliche, but it’s true. He doesn’t like to be photographed but it wouldn’t be right to write about this project and not at least mention his support. When I called him up to ask if he would help, I knew that I needed to be ready with where I could leverage his skillsets and enough materials and workspace to fly. Even with my preparation, I was still impressed with his support as he was able to complete the area I had laid out for him in half the time solo than the area my wife and I did together.
So I summarize my points below
Target your labor force to match your scope of work
Leverage individual strengths
And get out of the WAY!
I hope you found something insightful in this post and if you have experiences you’d care to share, please leave comments below and follow my blog to the right.
For homes with kids, pets, or humans for that matter, a common disdain for the amount of dirt captured and retained by carpet is a common sentiment. Save for the kitchen, bathrooms, and entrances, our home had carpet throughout; the carpet does a nice job of softening the space and provide acoustical benefits, but we knew it would have to go with our two kids under the age of 8 and two dogs. With this in mind, we elected to embark on a project to replace the flooring in our home with hard surface flooring in all areas except the bedrooms. The bedrooms are a hotly contested area for folks. Some say hard surfaces through and through, and others (me included) appreciate the softness carpet brings to a space, particularly spaces for recharge and rest. Yes, you can add a rug to the bedroom to achieve a similar result, but alas we did not go this route. With this scope outlined, let’s make our plan!
OUTLINE:
Select and procure flooring
Demo existing flooring and baseboards
Install new flooring
Install new baseboards
Move-in and enjoy!
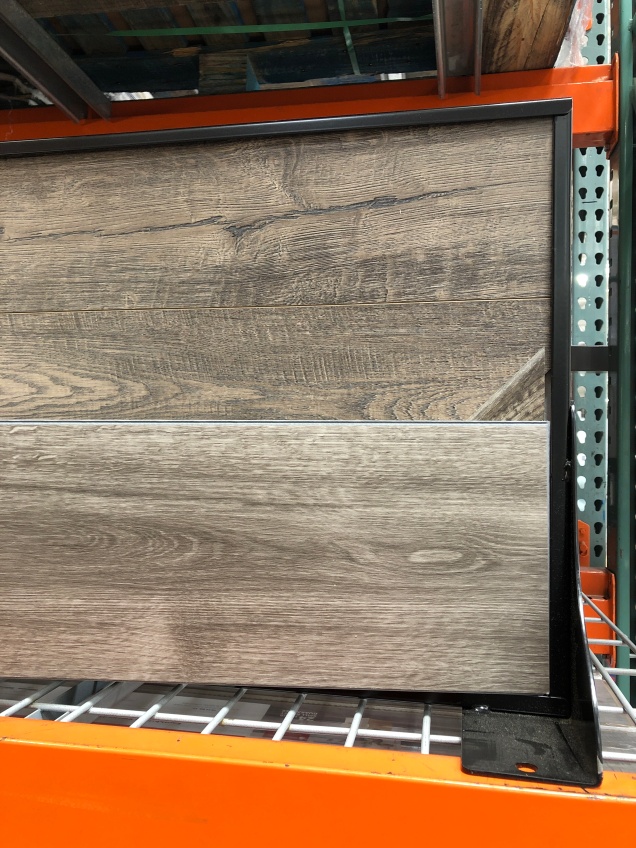
There are numerous options when it comes to hard-surface flooring, but when selecting flooring for a DIY project, it’s important to consider ease of installation. Tile, glue down vinyl, hardwood, concrete are all great surfaces but don’t lend themselves well to a home DIY’er. Great products to look into are engineered hardwood and vinyl plank flooring options. They typically utilize a tongue and groove snap together system that requires few tools and can be learned very quickly. For our project we selected Mohawk’s Rigid Vinyl Flooring in Misty Oak Misy Oak, we found it on sale at Costco and were able to save 22% on our material costs, a big win at the onset of the project.
Love me some Sales!
We selected a textured product with brown and grey tones
Time For Demo!
The demo is always a FUN part of a project. I started upstairs with carpet removal and worked my way downstairs. I utilized a utility trailer to take materials to the dump, but if that’s not an option for you Waste Management has a Bagster program that helps with a home remodel jobs like this. You can also contact your waste disposal provider to arrange for a dumpster too. For sure the hardest part of this demo was the removal of the ceramic tile in the kitchen. We went to work using a sledgehammer and digging bar and found ourselves spending way too much time on it. I went and rented a medium-sized roto hammer from Home Depot and that sped up the job considerably. I was really surprised at the amount of waste the tile demo created.
Carpet is the easiest flooring to demo. Just grab a corner with some plyers and give it a yank. It’ll feel like unzipping a zipper. PRO-TIP: Cut up the carpet into manageable pieces so you can easily carry out of your house.
Puppers was depressed we were taking away his carpet.
Get help from little destroyers, focus that potential energy!
Know when to get a bigger Hammer.
Electrical jackhammer is a magical thing
Still a work out though.
Let’s get to installing!
I’ve done two houses now with this type of flooring and I would say it is some of the easiest stuff to install, once you get the hang of it. The instructions that come with the material talk about locking the material together using a block and hammer to tap it in. A more experienced friend of mine showed me that you can lock the material together without the use of the bar and hammer by lifting the preceding plank to get the angle right to snap the tile together. This method is superior for two reasons. 1. less likely to damage the plank locking system and 2. speed, it’s WAY FASTER. I will say this material was easy to work with as you could use a utility knife to score the material and snap it off without the use of a table saw for every cut.
I also took the opportunity to relocate a HVAC vent that was originally located near the front door that guests often stepped on when coming in the house. Looking under the house I found that there was enough slack duct to make the move and not extending the duct lateral.
Start in a corner, and pick a flow direction that invites people into the space. A trick I use is run parallel to the front door.
Moved the HVAC vent to prevent people walking on it when you enter the home.
Spelunking under the house was not on my to do list when doing floors.
In progress, notice the staggered joints. It may have been better to put an expansion joint here and start the patter over again.
Install new Baseboards
Both times I’ve done floors, I’ve ended up replacing all the baseboards. This is for two reasons 1. it’s near impossible to remove existing baseboards without breaking the boards, and 2. baseboards get dinged up over time and new ones look great with a fresh floor. In this install, I elected to upgrade from the typical builder standard of 2 5/8″ tall boards to 5-1/4″ boards. I would highly recommend anyone installing new baseboards upgrade to this style as it is marginally more expensive and creates such a custom home impact. A required tool to complete this job is a compound miter saw, which allows you to set angles to cut corners. I also found using a Dremel tool to cut inside coping corners worked really well. The last thing to do after nailing the boards to the walls is to caulk the joints and spackle all the nail holes.
SCOPE CREEP!
No home project would be complete without a little bit of scope creep. In my case, that creep was to remodel my downstairs bathroom. This was caused during the demolition where it was discovered that in order to remove all of the tiles, I would need to remove the toilet and pedestal sink. Much to my dismay and the glee of my wife who was not a fan of that bathroom. In the end, the remodel cost about $500 and was worth every penny.
Oh love the color….said no one ever
Pre-built vanity options at Home Depot are a great option.
Measure, measure, and measure again to make sure it will fit.
Poof, no toilet no sink
Needed to install a new toilet flange…sewer lines are fun right??
Ta Daaaa!!!
A FINISHED PRODUCT
Replacing the floors in the house completely changed the look, feel, and function of our home. The floors look great and are very easy to clean. I will say since the install, small gaps have shown up between some of the planks. Not sure what’s to blame as the vinyl planks are purported to be expansion resistant. I’ll likely need to remove some baseboards and tighten things up at some point, but that will be for another blog. If you have questions about my process or comments, please comment below and follow my blog for future projects.
Upstairs play area turned out great.
First floor done! The fam was happy to get rid of the camp chairs we had been using for over a week.
In , Part One of the DIYer’s Zen game, I walked through project where I refinished my existing kitchen cabinets with new paint. While numerous hands on lessons and tricks were learned along the way, I want to share how the project helped me grow professionally with the concept of patience. All too often, we find ourselves thinking reactively in the workplace for one reason or another. Maybe it’s due to critical deadlines, demanding customers, or a significant decision point. This project taught me it’s better to take measured approaches to things and forecast down the road a bit to prevent future challenges.
Early in the project, I realized that this project was going to take much longer than the internet would lead you to believe. At the time of the project, I was in-between sessions in my Master’s program and I was hoping to complete the project in the two weeks that I had off. I felt stressed that if I don’t get this done in two weekends, I would be picking away at the cabinets all summer long. I painted the first few cabinets with only minimal prep and a quick spray, what I ended up with was a dimpled sub-satisfactory product. I ended up sanding the doors I painted and redid the job, and going forward spent more time prepping than actually painting. When I went back to spraying the paint, I grabbed a set of headphones and listened to an audiobook to help me stay productive in school, while still making progress on the project. I found myself working until I got to the end of the chapter and filling that time with making the prep or painting come out just right.
Rushed the prep job, ended up with streaks and dimples. Ended up repainting several doors because of this.
The next time you find yourself making a quick decision and possibly getting tunnel-visioned on the stress factor, in my case the timeline to get the project done quick, take a pause. Try and get yourself out of the quick reaction thinking, and ask yourself “If this, then that” This is a common coding phrase that expands to the concept of If I do this thing, then that other thing should happen. It’s a mantra I’ll ask myself and helps me take that pause. Maybe I won’t change the course of action, but I’ll head down that path a bit more confident I’m heading in the right direction.
If you liked this post, please follow me by clicking on the Subscribe button to the right!
My family and I moved into our house about four years ago, and we couldn’t be happier with the house we were able to land. The house checked almost all of the boxes, but one that it didn’t check was the kitchen was a bit dated. I of course was, “No problem, I can do that! Sounds like fun!” While my wife was less than enthused to hear my excitement about purchasing a house knowing I was going to open up a fresh round of construction projects.
oh, the chocolate brown island…
Can’t get enough Spanish style tile…
Nude cabinets look good in some cases….not this one.
The kitchen we bought with the house.
In this blog, I will delve into flooring, cabinet refinishing, appliance replacement, countertops, drywall work (because you can’t get away with renovations without damaging drywall, it’s a fact) among other areas. The area I’ve chosen first to dive into is refinishing cabinets; it is a project that pops up frequently on do-it-yourself forums, touted as a ‘great project to take on in a weekend’ or ‘refresh your kitchen in a snap!’. I’m here to tell you the tag lines I just referenced are wrong and the correct ones should involve ‘patience’, ‘Zen game’, and the like. But before I jump to the end, let’s talk about the process of how I refinished my cabinets.
The cabinets we have in our kitchen are plentiful and a good layout, but the color is bland and doesn’t highlight any particular feature. My wife and I decided to paint in leu of replacement, primarily due to cost. Preliminary estimates for replacing cabinets ranged in price from about $18,000 to $25,000 and beyond; while painting materials and supplies come in around $500.
When starting any project, it’s a good idea to do your best to identify the scope and set limits to the extent your project will impact. My kitchen is comprised of twenty-three cabinet doors, fourteen drawer fronts and cabinet boxes to match. Next, we’ll outline the broad brush strokes to get us to the finishline. Our objective is the following:
Remove all the doors and drawer fronts. Don’t forget to label everything!!!
2. Prepare boxes, drawer fronts, and cabinet doors. Cleaning, sanding, caulking are always mentioned as critical steps, but particularly so with projects where you desire smooth finishes such as cabinets. My process was to use a multi-surface cleaner and an abrasive sponge to remove dirt and grime, then move on to sanding and caulking the edges of the cabinet frames. Lastly, don’t forget to wipe down the cabinet one more time before painting to remove any sanding dust before painting.
Caulk line in blue.
3. Paint, paint, and paint some more. Early on in the process, my plan was to brush and roll everything, it’s cheap and easy. What I found is that would be fine if I was willing to spend the rest of my natural life painting these cabinets. I invested in a simple paint sprayer and it changed my life. Suddenly we were in high production, but my advice here is you still need to be meticulous and slow with making sure paint is applied evenly on all surfaces in sufficient amounts.
Choose your work space wisely…this one made the sink basically unavailable…
Use a brush and roller to paint the boxes
Better location, but still in the way.
Don’t believe all in one primer and paint labels! Prime everything, will save you heart ache later.
Give yourself some breathing room to work.
Where a mask, the paint mist get’s everywhere.
In progress
4. Reinstall everything – This is where the labeling becomes critical, as you might think all the drawers and doors are the same size, but they are likely not. Take your time and use the hinge adjustments to get the cabinets to sit square. Finish it off with some fresh little rubber bumpers to make up any gaps on the doors and to quiet closing.
Man ready to not see all the cabinet clutter….
I painted the bottoms first cause I wasn’t sure if I wanted to carry the blue to the upper cabinets as well.
ummmm, where did these belong?
Really like how the two tone turned out.
In the end, this project took a little over 2 months to complete, only using partial weekends, but it completely refreshed the look of the kitchen and did not cost very much….except for sweat and patience.
Leave your comments and questions below and I’ll do my best to answer, and follow my blog to get notifications for when I upload my next project.
Have you ever been looking at something, and pondered this would be even better if…? I know I have.
In my experience, continuous improvement is a core principle for all aspects of life. Forward progress is much like the shifting sands at the beach. If you push and mold the sand to create the desired landscape and then cease that molding, the sands will slowly drift and return to their previous state, such is the case with continuous improvement. One must continuously look at the world from the lens of “Even better if…“
Some background: I graduated undergrad in 2007 just before the recession and quickly found myself in the same situation as so many others, accepting jobs that I would have previously not considered as an Engineer. I consider myself very fortunate that I could continue working and was even able to purchase my first home out of foreclosure. We were a young family just getting by, and while we loved our first home, I wanted to make it my own, and hiring contractors to make the changes I wanted was out of the question. I was raised in a hands-on environment, and I wasn’t afraid to do some discovery learning; thank goodness for YouTube and google.
So as I looked around my situation, I started making affirmations like “The backyard would be even better if it actually had landscaping and a patio to enjoy instead of the dirt patch it currently was.” or “This floor would be even better if, it was a hard surface style that would hold up to the onslaught of kids and dogs.” Now I know the first thought to many is it’s fine to dream and window shop on Pinterest, but I can’t do those things, but I’m going to tell you that you can. I had similar feelings, but I thought, “What’s the worse that can happen?” The sprinklers in the backyard don’t turn on after I install them; Google to the rescue! Or maybe the flooring doesn’t quite turn out the way I was hoping, Youtube to the rescue! Remember that contractors and installers don’t have any superpowers that you don’t possess; you simply need to have the resolve to figure out a problem and curiosity to dive into new areas.
In this blog, I will write about the projects I take on after asking myself this question, the experiences I gain, the successes, the failures (or learnings) as I call them, and how I learned to have the confidence to fail.
This affirmation is applicable everywhere: home, education, career, family, relationships. What part of your life would be even better if….? Feel free to leave your answer in the comments below; who knows, I may have been there too.